Showing posts with label InfoPath 2007. Show all posts

Friday, 19 June 2009

How to use Cascading Dropdown List Boxes within an InfoPath Web Form

Introduction

To create user‐friendly web forms, cascading dropdown list boxes is a must, but InfoPath Form Services doesn’t allow you to use them, like you can use them with InfoPath Client.

HOW TO use Cascading Dropdown List Boxes within an InfoPath Web Form.docx

Design the InfoPath Form

1. Create the data connections to the different data.

2. Note:
Be sure the Data Connection is not retrieving the data automatically for the Cascading Dropdown list box. The data connection used for the Main Dropdown list box must be set to Automatically retrieve data when form is opened

3. Add the Dropdown list boxes to your form + link the Data Connection to it

4. Open the properties dialog box of the main dropdown list box

5. Select Browser Forms Tab

6. Select Always


Figure 1. Browser forms options of the Main Drop Down List box

Note:
The next step will open Visual Studio Tools for Applications, be sure to have set the Form Template Code Language to C#, (Menu Tools ‐ > Form Options ‐> Programming

7. Right‐Click the Main Drop down list box, select Programming ‐> Changed Event…

8. Add the following code to the newly created Change event function


9. Add a private function to the FormCode

10.In the Change event function, change the strings to their corresponding values

Publishing the form

When using Managed Code with a InfoPath Web Forms a SharePoint Administrator must validate the form first

1. Use the normal way of publishing, the difference will be that a XSN file will be saved locally.

2. Open the SharePoint Administration Central

3. Go to Application Management

4. Click on Manage Form Templates

5. Click on Upload Form Template

6. Select the XSN, created by the publishing tool in point 1

7. Click on the Upload button

8. Back in the Manage Form Templates Screen, click on the Form Template and select Activate to a Site Collection

9. Change the Site Collection if needed

10. the Ok Button

11. Go to the Forms Library and select the settings

12. Go to Advanced Settings

13. Set Allow management of content types to YES

14. Select Display as webpage

15. Save the new settings

16. Back in the Settings Screen, Click on Add from existing content types link in the Content Type section

17. Select your Form and click the Add button

18. Test your form

Conclusion
This way of working will let us use Cascading Dropdown boxes

Saturday, 30 May 2009

Display login user name on InfoPath form automatically

The GetProfileByName method returns a PropertyData array. You can think of it as a repeating table of name and value pairs.
So Now that you have a data connection that can get the current users, you can use it values. In this example I will show the user's first name in a textbox.

1. Add a textbox to the form.

2. Go to the first textbox's properties (double click it).

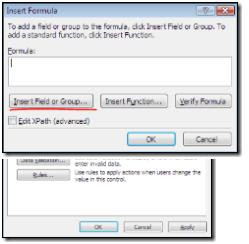
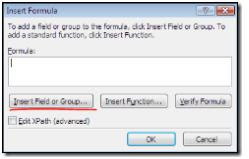
3. In the 'Default Value' part, click the 'fx' button next to the 'Value' field. this opens up the formula builder dialog.


4. Click 'Insert field or group'.


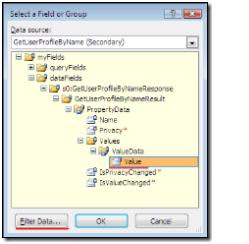
5. In the data sources drop down, choose the GetUserProfileByName data source.
6. Expand all groups under the 'dataFields' group, and choose the 'value' field. Don't click OK yet!
7. With data 'value' field selected, click the 'Filter Data...' button and 'Add...'.
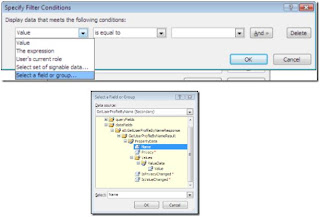
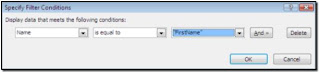
8. In the first drop down (value) select 'Select a field or group...' and choose the 'Name' field under the 'PropertyData' group.


9. Leave the middle drop down as is ('is equal to') and in the last drop down choose 'type a text...'.


10. This is the part where you specify which property to put in the textbox. As we said the method returns multiple properties about the user. For this textbox we want to put the user's first name in, so type 'FirstName' (this is case sensitive!). I have included the property list you can use here (just below), so if you want some other property, just type its name instead.

11. That's it, all we have to do is to confirm everything so Click 'OK' for every open dialog box until you are back in the design mode.

12. click 'Preview' and see the wonder!

13. If you want more details repeat steps 1-11 and enter different property names in step 10.
Finally, as I Promised, here is the complete list of default profile properties get returned by the userprofileservice.


I think they are pretty self explained:

UserProfile_GUID
AccountName
FirstName
LastName
PreferredName
WorkPhone
Office
Department
Title
Manager
AboutMe
PersonalSpace
PictureURL
UserName
QuickLinks
WebSite
PublicSiteRedirect
SPS-Dotted-line
SPS-Peers
SPS-Responsibility
SPS-Skills
SPS-PastProjects
SPS-Interests
SPS-School
SPS-SipAddress
SPS-Birthday
SPS-MySiteUpgrade
SPS-DontSuggestList
SPS-ProxyAddresses
SPS-HireDate
SPS-LastColleagueAdded
SPS-OWAUrl
SPS-ResourceAccountName
SPS-MasterAccountName
Assistant
WorkEmail
CellPhone
Fax
HomePhone

Tuesday, 26 May 2009

Populate InfoPath text box based on dropdown list box selection

Following steps will illustrate how to populate InfoPath form text box based on drop down list box selection.


Scenario is, when retrieving data from SharePoint list, we may need more fields to be appear in our InfoPath form based on our selection. The following example will show, how to retrieve items description based on item code selection in SharePoint list.

Steps


Create a data source to retrieve data from SharePoint lits in InfoPath
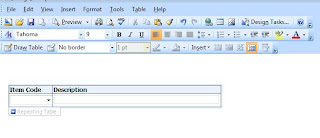
Add repeating table as follows (You can add any data control from InfoPath controlls)
Change text box to drop down list box in item code column in the repeating table
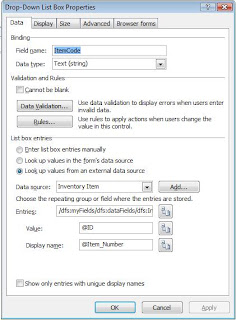
Double click the drop down list box and select the data source connection you created for the SharePoint list to retreive data from


Click the RULES button to create a rule for this drop down list box

Add rule - add condition - action (select the field's value as) - field (select the field you want have the display. In this case its item description text box)

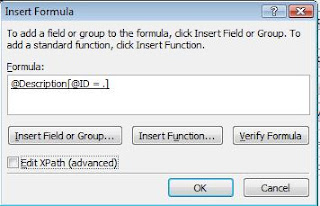
Click on Fx button to insert formula - click insert field group - select data source (secondary) - select description field - click on filter data button - click add - select ID from secondary data source is equals to Description from the secondary data source


Click on OK button untill you return to following screen


Click on EditXPath (advanced) check box and change the code as follows


xdXdocument:GetDOM("Inventory Item")/dfs:myFields/dfs:dataFields/dfs:Iventory_Item/@Description[../@ID = current()]


Finally when you see the preview of created InfoPath form, you should be able to retrieve Item description by selecting Item code in drop down list box.